How to Make Keychains: Easy DIY Methods, Ideas & Tips
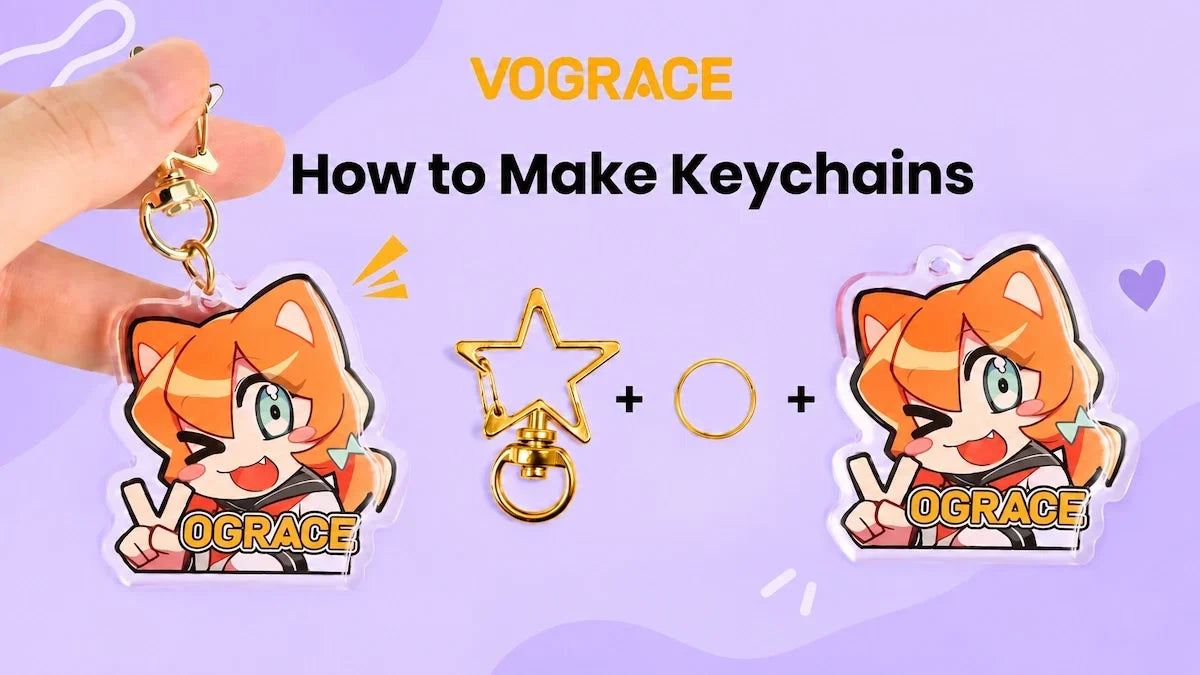
Making a keychain is one of those craft projects that can be as simple or as detailed as you want it to be. A few beads and a cord can become a five-minute bag charm; a small clay piece can turn into a character accessory; and a printed acrylic blank can carry your own artwork. The basic idea stays the same: make a charm that is light enough to carry, give it a secure attachment point, and connect it to hardware that can handle everyday use.
This guide covers the practical side of how to make keychains at home, including the tools you need, the basic assembly process, seven DIY methods, design ideas, durability tips, and common mistakes. If one material catches your interest, you will also find links to more detailed Vograce tutorials so you can go deeper without turning this guide into a hundred-step project.
What Do You Need to Make a Keychain?
You do not need every tool on the craft-store wall. Most DIY keychains use the same small set of hardware, then add material-specific tools only when needed.
|
Item |
What It Does |
When You Need It |
|
Split key ring or clasp |
Holds the finished keychain on keys, bags, or zippers |
Almost every project |
|
Jump rings |
Connect the charm to the main ring or clasp |
Most rigid charms |
|
Jewelry pliers |
Open and close jump rings cleanly |
Metal hardware |
|
Scissors or craft knife |
Cut cord, paper, vinyl, felt, or thin craft materials |
Material-dependent |
|
Hole punch, awl, or small drill |
Creates an attachment point |
Wood, acrylic blanks, clay, resin, metal blanks |
|
Adhesive or sealer |
Bonds layers or protects a surface |
Paper, fabric, wood, vinyl, some acrylic DIYs |
Beginner tip: buy hardware first, then design the charm around it. A beautiful charm with a hole that is too small, too close to the edge, or incompatible with your jump ring is frustrating to fix later.
How to Make a Keychain: The Basic Steps
The exact technique changes with the material, but nearly every homemade keychain follows the same five-part workflow.
1. Choose Your Design
Start with a shape that reads clearly at a small size. Initials, simple characters, symbols, fruit, flowers, pets, short names, and bold icons all work well. If you are drawing your own artwork, reduce it to roughly the final size on screen before you commit. Tiny facial details or thin lines that look fine on a large canvas can disappear on a keychain.

2. Pick the Right Material
Choose the material based on the look you want and the tools you actually have. Beads and cord are easy for beginners. Felt is forgiving for sewing. Polymer clay is good for sculpted shapes. Acrylic blanks work well with vinyl or printed inserts. Resin can create glossy molded pieces, but it requires more careful handling and product-specific safety steps.
3. Make the Keychain Charm
Cut, string, sew, sculpt, print, stamp, or cast the main decorative piece. Keep the charm comfortable to carry: very large or heavy pieces can pull on bags and put more stress on the connector.

4. Add the Hole and Hardware
If the charm does not already have a hole or loop, create one using the method appropriate for the material. Connect it with a jump ring, screw eye, fabric loop, eye pin, or similar finding. When using a jump ring, twist the ends sideways to open it rather than pulling them apart; this helps the ring return to its original shape when closed.
5. Finish and Test Your Keychain
Check rough edges, loose knots, uncured coatings, open jump rings, and weak attachment points. Give the finished piece a few firm tugs before putting it on keys or a backpack. If the charm uses paint, paper, or printed vinyl, add a compatible protective finish when the project calls for one.
7 Easy DIY Keychain Methods to Try
There is no single best way to make a keychain. The easiest method depends on whether you prefer threading, drawing, sculpting, sewing, or working with small tools. These seven approaches cover most beginner-friendly styles.
1. Beaded Keychains

Beaded keychains are one of the quickest places to start. You can thread beads onto nylon cord, elastic cord, waxed cord, wire, or a pre-made keychain loop. Alphabet beads are useful for names and initials, while larger focal beads can turn a very simple pattern into a finished-looking charm.
A basic version is simple: cut the cord, secure it to the ring, plan the bead order, thread the beads, then finish with a knot or crimp that cannot pull through the final bead. Keep the strand short enough that it will not constantly catch on other items in a bag.
Want the full method? Read our How to Make Keychains With Beads Guide for materials, threading steps, and beginner-friendly ideas.
2. Acrylic Keychains

For a home DIY, the simplest acrylic route is usually a pre-cut acrylic blank rather than cutting acrylic sheet yourself. You can decorate the blank with adhesive vinyl, printable waterproof vinyl, a small paper insert, paint markers, or other compatible craft materials. Pre-drilled blanks make the hardware step much easier.
Plan the artwork around the hanging hole and leave breathing room at the edges. If you use printed material, test your ink and sealer combination first; some coatings can make certain inks bleed or change the finish.
For two beginner-friendly approaches, see How to Make Acrylic Keychains Step-by-Step Guide.
3. Resin Keychains

Resin keychains are popular because molds make it easy to create letters, hearts, stars, tags, and layered effects with pigments, glitter, foil, or other resin-safe inclusions. They also have a smooth, glossy finish that is hard to copy with paper crafts.
The trade-off is that resin is not a casual, no-prep material. Epoxy and UV resin products can differ in mixing, curing, ventilation, protective-equipment, and handling requirements. Follow the safety data and instructions for the exact product you use, keep uncured resin off your skin, work in an appropriate area, and do not treat every resin formula as interchangeable.
For a molded epoxy keychain, the broad process is to prepare a clean mold, measure and mix according to the manufacturer’s directions, add compatible color or decoration, pour slowly, allow the resin to cure completely, finish rough edges if needed, then attach an eye screw, bail, or other suitable connector.
If you want a full beginner walkthrough, use our DIY Resin Keychains Guide for Beginners.
4. Shrink Plastic Keychains
Shrink plastic is great when you want hand-drawn artwork without the weight of clay or wood. Draw or print on plastic that is specifically made for shrinking, cut out the shape, punch the hanging hole before heating, then shrink it according to the package directions. Once cool, add a jump ring and keyring.
Remember that the finished piece becomes much smaller and thicker. Make the original artwork larger than the size you want, keep lines bold, and make the hole generously sized before shrinking. Different brands shrink at different rates, so make a small test piece before creating a detailed design.
5. Clay Keychains
Polymer clay works well for miniature food, simple mascots, initials, flowers, geometric shapes, and textured charms. Roll the clay to an even thickness, cut or sculpt the design, then create the attachment point before baking if your hardware requires it. Bake only according to the clay manufacturer’s temperature and timing instructions.
For air-dry clay, allow the piece to dry fully before sanding, painting, or sealing. Clay keychains look better when the design is compact and the connector is reinforced; very thin projecting parts are more likely to snap during daily use.
6. Fabric and Plush Keychains

Felt and fabric are useful when you want something soft, light, and easy to customize with stitching. A basic plush keychain is essentially a miniature stuffed shape: cut a front and back piece, add facial or decorative details while the pieces are still flat, sew around the edge, leave a small opening, add stuffing, then close the seam.
The hanging loop matters more than it seems. Sew a folded ribbon or fabric tab securely into the seam instead of attaching a ring directly through a thin layer of fabric. For first projects, choose rounded shapes and avoid long, narrow limbs or ears that are difficult to turn and stuff evenly.
For the complete sewing process, continue with How to Make Plush Keychains Complete DIY Guide.
7. Metal Keychains

Metal sounds less beginner-friendly, but you do not need to fabricate a keychain from raw sheet metal. Start with a purpose-made metal blank. Hand stamping is a practical option for short names, dates, coordinates, or simple words; printed vinyl on a flat blank offers another route for colorful artwork.
For stamping, work on a solid surface with tools made for metal stamping and practice on a spare blank first. For printed designs, use materials and coatings that are compatible with the blank and follow any resin or sealer safety instructions exactly.
See both approaches in How to Make Metal Keychains DIY Tutorial.
DIY Keychain Ideas to Make Your Design More Personal
Once you know how the hardware works, the fun part is deciding what the keychain should say about you. A good idea does not need a complicated technique; it just needs a clear focal point.
· Name or initial keychains: Use alphabet beads, stamped metal blanks, clay letters, or a printed monogram.
· Character charms: Simplify a favorite original character into a strong silhouette, expressive face, or signature accessory.
· Photo keychains: Use a photo insert, printed vinyl, or a small sealed paper image on a suitable blank.
· Friendship or matching sets: Split a phrase, color palette, symbol, or paired design across two keychains.
· Bag charms: Use a swivel clasp or lobster clasp and slightly larger decorative elements designed to clip onto a tote or backpack.
· Tiny food and object charms: Clay works especially well for fruit, desserts, game items, mini books, plants, and other recognizable objects.
· Gift keychains: Dates, initials, pet portraits, maps, and short messages make small handmade gifts feel personal without needing a large project.
For a wider set of cute, beginner-friendly concepts, browse How to Make Cute Keychains DIY Ideas & Custom Options rather than repeating every idea here.
Tips for Making Better DIY Keychains
· Keep small designs simple. A keychain is viewed at arm’s length and often moves around. Strong silhouettes, readable text, and clear contrast usually work better than tiny details.
· Match the hardware to the charm. A heavy charm needs a stronger connector than a tiny bead strand. Do not rely on a weak loop simply because it fits through the hole.
· Leave room around the hanging point. Holes placed too close to an edge can weaken rigid materials. Leave enough material around the connector to resist everyday pulling.
· Finish the surface for the way it will be used. Paper and printed surfaces may need protection from rubbing or moisture. Fabric may need reinforced stitching. Clay edges may need light sanding after curing.
· Test before you trust it. Pull on the connector, check every jump ring, and carry the keychain around the house for a day before attaching it to something valuable.
· Make one prototype first. If you plan to make gifts or a small batch, finish a single piece before cutting, printing, or mixing materials for ten more. It is much easier to fix spacing, weight, and hardware at the prototype stage.
Common Keychain-Making Mistakes to Avoid
Most failed keychains are not ruined by the artwork; they fail at the small practical details. Watch for these problems before you call the project finished.
· Putting the hole too close to the edge: This can cause cracking, tearing, or a weak connection point, especially in rigid or brittle materials.
· Using an open or poorly closed jump ring: A tiny gap is enough for a thin loop or chain to work its way out. Close the ring so the ends meet neatly.
· Choosing the wrong adhesive: Craft glue that works on paper may not bond well to smooth plastic, metal, or fabric. Check material compatibility before assembling the final piece.
· Adding too much weight: Large beads, thick resin, heavy metal blanks, and multiple charms can turn a cute keychain into something awkward to carry.
· Rushing drying or curing time: Glue, paint, clay, resin, and protective coatings need their full recommended time. A surface that feels dry can still be soft underneath.
· Ignoring wear and friction: Keychains rub against keys, bags, pockets, and desks. Protect printed or painted surfaces when needed, and place delicate decorations where they are less likely to catch.
DIY vs. Professionally Made Keychains
DIY is usually the more satisfying choice when the making itself is part of the goal. Professional production makes more sense when consistency, repeated artwork, special materials, or a larger quantity matters more than the hands-on process.
|
|
DIY Keychains |
Professional Custom Keychains |
|
Best for |
Crafting, experiments, one-offs, handmade gifts |
Artist merch, events, repeat designs, larger batches |
|
Quantity |
Usually a few pieces at a time |
Small runs through bulk orders, depending on product |
|
Finish |
Handmade and intentionally varied |
More consistent from piece to piece |
|
Tools |
You supply the materials and equipment |
Production equipment is handled by the manufacturer |
|
Options |
Limited by your home tools and materials |
Can include specialized printing, cutting, materials, and finishes |
Turn Your Artwork Into Custom Keychains
Sometimes the best outcome of a DIY project is discovering a design you want to make again. If you are preparing artist merch, convention stock, gifts for a group, or a repeatable product for your shop, manufacturing removes the need to cut, seal, drill, sew, or assemble every charm by hand.
Vograce offers custom keychains across acrylic, wood, metal, plush and fabric, PVC and rubber, and other styles, with product-specific choices for shape, size, accessories, printing, and finishes. The exact options vary by product, so it is better to choose the material first and then check the available customization settings for that item.

You can explore the current range in the Vograce Custom Keychains. For DIY makers, this is best treated as a next step rather than a replacement for crafting: prototype your idea by hand, refine what works, then consider professional production when you need consistent multiples.
Start Simple, Then Make It Yours
The easiest way to learn how to make keychains is to finish one simple project before chasing a complicated design. Start with beads, a felt shape, a pre-cut blank, or another material you already understand. Pay attention to the connector and hardware, because those small details decide whether the finished piece survives daily use.
After that, experiment. Mix textures, make matching sets, turn your own characters into charms, or try a new material. A keychain is small enough to finish in an afternoon, but flexible enough to become anything from a handmade gift to the first prototype for your next merch idea.
Frequently Asked Questions About Making Keychains
What materials can you use to make keychains?
Common DIY materials include beads, cord, acrylic blanks, shrink plastic, polymer or air-dry clay, felt, fabric, wood blanks, metal blanks, and resin. Choose a material that matches your tools, experience, and intended use.
What is the easiest keychain to make?
A simple beaded keychain is one of the easiest beginner options because it needs very little equipment. Felt shapes and pre-cut acrylic blanks are also approachable.
How do you attach a charm to a keychain?
Most rigid charms connect with a jump ring between the charm and the key ring or clasp. Fabric and plush charms often use a sewn loop. Some resin, clay, or wood pieces use screw eyes, eye pins, or glued bails.
How do you make keychains without resin?
Use beads, cord, shrink plastic, polymer clay, felt, fabric, wood blanks, metal stamping blanks, or pre-cut acrylic blanks with vinyl or printed inserts. Resin is only one of many keychain-making methods.
Can you make keychains without a Cricut?
Yes. A cutting machine is optional. You can cut vinyl or paper by hand, draw on shrink plastic, sculpt clay, string beads, sew felt, stamp metal, or use pre-cut blanks.
How do you make DIY keychains more durable?
Use secure hardware, keep holes away from fragile edges, choose material-compatible adhesives, let coatings or resin cure fully, reinforce fabric loops, and protect printed or painted surfaces when the project requires it.